Publishing Version |
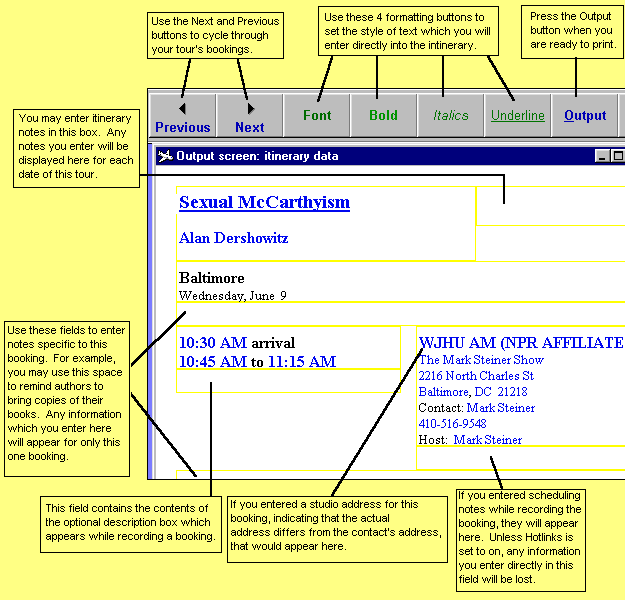
Printing Your ItinerariesOnce you have entered events into your Promotional Tour, you may print out a summary of one or all of those bookings. To do this, open your Promotional Tour project. Select the Itinerary tab. On the left side of the screen, you will see a list of dates for which you have bookings or travel days. To print out or view the bookings from a single day, drag that date onto the Publicity Assistant desktop (the light blue background screen). To print or view all bookings for a given Promotional Tour, drag any date onto the Publicity Assistant desktop. A schedule summarizing the day’s events will appear. You can now cycle between dates using the Next and Previous buttons in the toolbar. Before you print your itinerary, you may modify it in a number of ways. The diagram below outlines which areas of the itinerary may be modified: Notice that some information may be entered directly into the form, while
other information was entered during the booking process. For example, the area
below the call sign will display a studio address if you entered it during the
booking process. The same is true for the Description field, which appears
directly below the booking time. You may edit the booking information at any time
directly on the schedule. To do this see, Editing your Itinerary.
Printing Your Itinerary
After making your modifications, you may print the itinerary by pressing the
Output button on the toolbar. You will notice that the toolbar will change,
providing you with a number of printing options:
|