Adding a Single Contact to a Tour
Adding a Single Contact to a Tour
Entering a Contact from the Main Media Data to a Promotional Tour
The most common way to add a contact to a Promotional Tour is to import it from the Main Media Database. Once the contact has been added to your
project, you can then create a booking related to that contact.
To import in an individual contact from your Main Media Data, follow these
steps:
- Be sure that your project is open. To do this, first select the Promotional
Tours tab of the main Publicity Assistant 2000 window. Next, select the project
by clicking on it once, and typing enter on your keyboard. For more
information on opening a project, see Opening Projects.
- Select the Main Media Data tab from the main Publicity Assistant 2000 window.
If the main window is not visible, go to the Window menu and select Publicity Assistant 2000. . It is important that your project list be visible behind the Main Media
Data window.
- In the Main Media Data, find the name you wish to add to your Promotional
Tour. From here, you have two options:
- Drag the contact from the Main Media Data to your Promotional Tour. Drag it
to any visible area of the promotional tour list. When you release the mouse
button, the name will be added to your list. The project window will move
forward and the save and undo buttons will be activated.
- Click on the name once, and then press the Send button on the toolbar.
Alternatively, you can type control-n on your keyboard. If you have more than one
project open, you will be asked to which project this contact should be added.
Again, the project window will move forward and the save and undo buttons will be
activated.
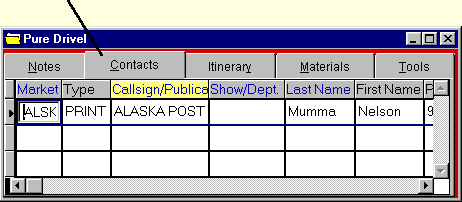
- To confirm that the contact has been added to your Promotional Tour by
selecting the Contacts tab of your Promotional Tour’s window:

For more information on Promotional Tours, see:
Quick Search
Creating a New Promotional Tour
Adding a Group of Contacts to a Tour
|