Creating a New Promotional Tour
Creating a New Promotional Tour
The first step in creating a new Promotional Tour is to add a new project. To
do this, follow these steps:
- Select the Promotional Tours tab in the Publicity Assistant 2000 Main Screen.
- Press the ADD button on the toolbar.

Alternatively, you may type control-A, or double click in any unused project
space. After pressing the ADD button, you will be prompted to enter a name for
your project. Enter a name and type enter on your keyboard. The Promotional
Tour Project Window will open. (When you close the window you will see the name
of your project added to the list of projects and highlighted in yellow).
- To begin working with your list, you must open it. To do this, click once on
your list (the list will be highlighted yellow) and type enter. Alternatively,
you may either: double click on it; drag it to the background screen; click on
it once and press the edit button on your toolbar; right-click on it and
select OPEN from the popup menu. A new project window will appear:
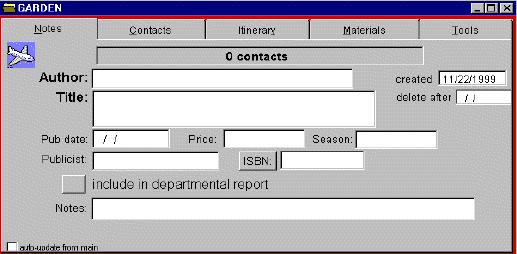
- In the Project Window, the Notes tab will be selected. The created and Publicist fields will be automatically populated with system data. You may enter any
information you wish in the Author, Title, Pub date, Price, and Notes fields.
Alternatively, you may choose to leave some or all of these fields blank.
- If you would like this tour included in your departmental publicity reports,
check the button next to “include in departmental report” by clicking on it. You may select or de-select this option at any time, so
if you are not sure, don’t worry. See Publicity Reports - Departmental for more information.
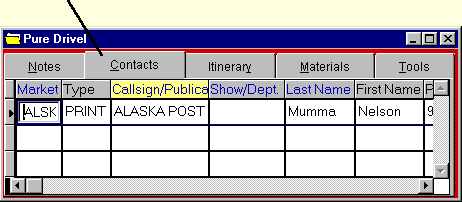
You will notice 5 tabs: The contacts tab, where the media contact information is stored; the itinerary tab, where the scheduling information is stored; the materials tab is for boilerplate functions; and the tools tab is where you can check for duplicate entries and use other system tools such
as importing and exporting data.
You are now ready to add contacts to your Promotional Tour. For information
on adding contacts, see Adding Contacts to Promotional Tours.
|