Publishing Version |
Duplicate Checking ProjectsAlthough Publicity Assistant sometimes checks to see if added contacts already exist in a list, it is possible to have duplicate entries. To check a project for duplicates, open that project and select the Tools tab. At the top of the page you will see three items relevant to dupe checking – the Dupe Check button, the Similarity Scale, and the blue criteria box: Figure 1 The Similarity scale determines how Publicity Assistant will identify dupes.
As you slide the white bar to the left, records need only have a few items
partially match for them to be considered duplicates. As you slide the bar to the
right, they must more closely match. The blue box to the right of the Dupe
Check button indicates the criteria Publicity Assistant will use to identify
duplicate records.
If you find you are getting dupes which have little in common, try running the
dupe-checker again with the Similarity Scale set further to the right.
Once you have set the Similarity setting, press the Dupe Check button.
Publicity Assistant will search your project for duplicate contacts, and display them
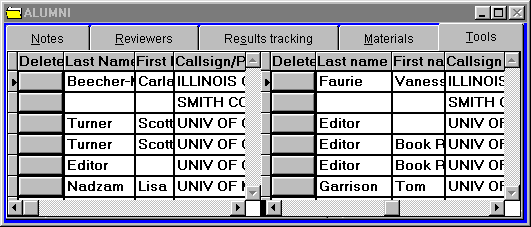
side by side in the project window:
Figure 2
 At the bottom of the main Publicity Assistant desktop, the Publicity Assistant
Duplicate Handler (figure 2) will appear.
Figure 3
 In the project window (figure 1), you can peruse the records at a high level,
and delete any which are duplicates. Each line of the window displays what
Publicity Assistant believes are duplicate records, based on the criteria you
chose before pressing the Dupe Check button. To delete one of the records from
your project, click in the Delete column next to that record.
You may also select the automatic deletion tool in the Duplicate Handler. As
you slide the control further to the right, Publicity Assistant becomes more
aggressive in what is considered a duplicate. You will notice check boxes being
checked automatically, indicating which records Publicity Assistant has marked
for deletion. After you have made your selections, press the “save changes” button and the duplicates will be deleted from your project and the duplicate
checker will close.
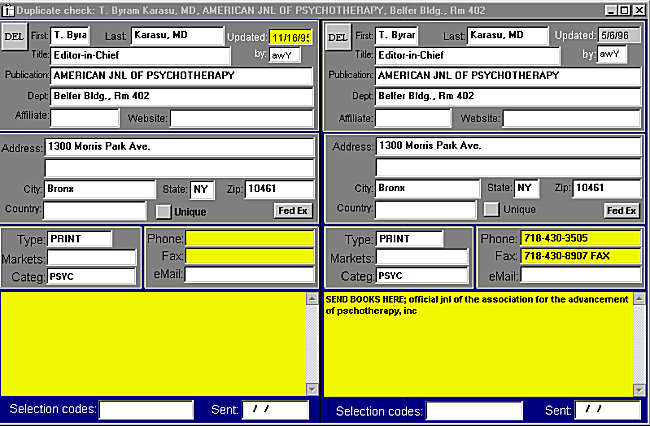
An easier way to view and delete duplicate records is to press the Edit pairs
button in the Duplicate Handler (figure 2). Pressing this button creates a
detailed side-by-side display of each duplicate, highlighting the differences in
yellow:
Figure 4
 You may now easily view all the information about each contact, and select one
to remove from your list by pressing the corresponding DEL button in the top
left corner of each record. You may also copy information from one record to
the other by simply dragging the appropriate field from the first record to the
corresponding field of the second record.
To move to the next record, you may press the Next buttons on your toolbar or
you may also use the page down button on your keyboard. Conversely, to move to
the previous record use the Previous button on your toolbar, or use page-up or
the left arrow.
When you have completed your selections for deletion, you may either save your
changes by pressing the Save Changes button in the Duplicate Handler, or
cancel your deletions by pressing Cancel Changes, or by simply closing the Duplicate
Handler toolbar.
|